Wednesday 18 April 2012

Nail Art Is So Easy Now With Nail Art Pens!!!!!

Now making your nails attractive and gorgeous is so easy with new creative and innovative nail art pens. These pens are available in so many appealing colors like pink, grape violet, golden, silver platinum, midnight black, juicy orange, true blue, red, yellow, radiant rose, cosmic purple and many more other colors. Nail art gel pen are also available. Through these pens you can decorate your nails and make more creative designs, even if you are not so expert in doing so you can easily create smooth and unimaginable rich nail art with more control and expertise. Nail art pens are filled with nail paints and some are fined-tip markers allowing you to have different designs on your fingernails and toe nails.
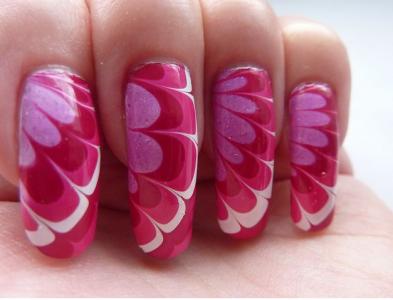
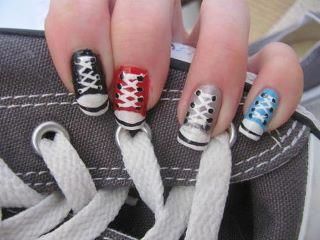
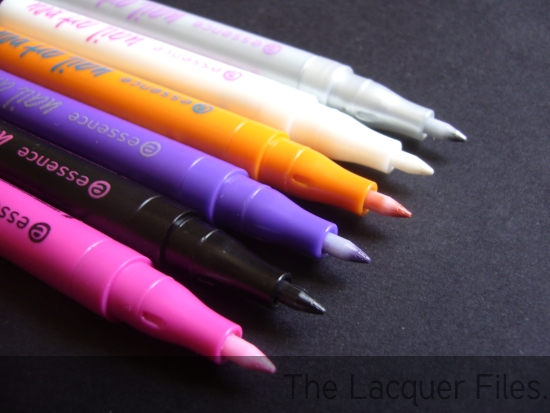
You can use these pens to make leaves, flowers, vines and outlines etc. You can also use it to write any word, your name’s first letter, your initials, and any favorite logo of the brand you are loyal with and much more designs with your creativity. Especially for the events like friendship day you create loving designs as a gift on your best friend’s nails, like for Valentine’s Day you can have red painted nails with white or pink heart on it. These pens are more attractive and desirable for sports lovers who are really crazy to show their love to their favorite teams. Nail art Gel Pens are basically water based and unique advantage of these pens is you can easily correct if any mistake in design occurs, simply clean up or wipe off the undesired part of nail design.


Basic Instructions:
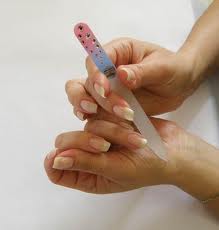
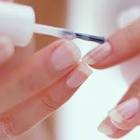
=> First apply base coat of light color and make it sure before applying any design that coat is dry in order to avoid any scratch on nails.
=>Select appropriate colors that matches your dress or according to the flair of design you want to make.
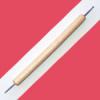
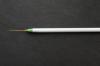
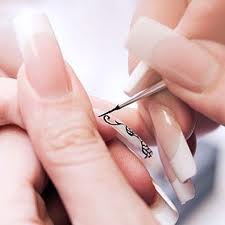
=>You can create now any design by pressing the nib of pen onto the surface of nail drag it slowly to draw lines or desired design or dot whatever you want.
=>Wait at least 10 minutes until the painted design to dry before applying top coat on it.
=>After that apply top-coat of shiner to make it more attractive.

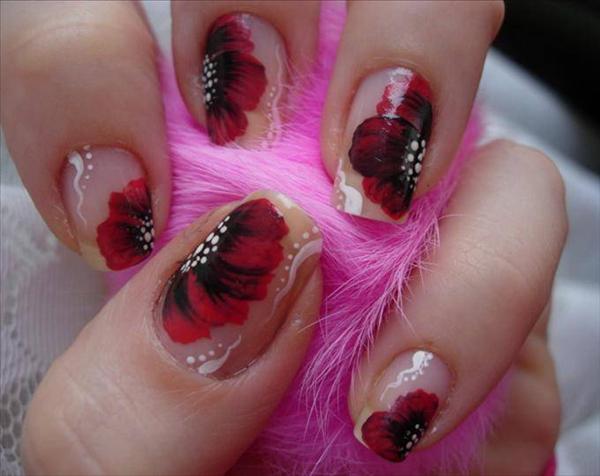
These nail pens are recent innovation and these versatile pens allows you to create creative designs with more accuracy like professional nail art designers. It’s a unique and useful invention especially for those girls who are conscious for their outlook and beauty.


 .

Thursday 15 March 2012

Create beautiful finger nail art designs at home


Do you want to look more pretty and attractive? Especially when you go for a party or in birthday party of your friend you want to look perfect and beautiful, nail art is in fashion now a day; it gives a unique look not only to your hands but the overall personality. If you are thinking that it is too difficult and expensive to buy tools for applying nail art then it’s not the case, there are many simple ways through which you can make your nails stylish and attractive.
One of most easy and interesting technique of nail art is “Water Marble nail art”. It brightens up your nail and gives you a unique flair to your appearance in your everyday life.
Well for applying marble art on your nails you need:
1. A bowl
2. Some water
3. A toothpick
4. And two or three nail paints of your favorite colors
Now first of all fill a bowl with some water and select the colors of nail paints according to your choice or the colors which are matching with your party dress. Let suppose you have choose pink and white colors, now one by one put just one drop of nail paint respectively into the water bowl. When you will put the drop it will spread in the water you have to put the each nail paint’s drop at least three times in the water then it will look like this picture……

Then take a toothpick and drag the water towards any edge and create a design of your desire, try different designs it’s fun. Now you have to apply natural oil moisturizer to your fingers but leaving the nails or you can cover the sides of your finger with anything like plastic sheet so that you can apply the design on your fingers smoothly without spoiling the beauty of your fingers. Then insert your nail into the water, the design you have make in the water it will appear on your nail.

It’s amazing, try it at your home and give your nails different look. It’s so easy to apply and you will enjoy doing that. But your success is when you apply it efficiently without having it around the sides of your nails because it will give a messy look to your nails rather than a beautiful or attractive look.

Sunday 11 March 2012

Nail Art Tools

This is a nail art tool which helps in making designs in the nails with the help of brushes and it named as "Brush Cleaner Holder". It is a plastic container with having capacity of 8 brushes and prevent one brush from another brush. Usually nail art brushes can be submerged but in this container every brush is separate from one another. This tool is very much helpful for nail art.

It is two way doting pen known as "Dotted Tool". This dotted pen is different in sizes and useful for creating dots, spots and swirl patterns easily. This tool helps when different colors of dots are used in the nail art, you can change the side of this dotted pen when you make different colors of dots on your nails.


This is finger rest tool. it can be used while creating nail art designs by putting your finger in this tool. This tool is called "Finger Rest For Nail Art".


This is another tool called "Nail Art Detail Brush Set (3 pecs)". These 3 brushes have different lengths, 1st have 5mm of length, 2nd have 9mm, and 3rd one have 12mm of length. These brushes are used for making small designs like making flowers, logos, cartoons, or any design which is detailed.


This is "Nail Art Flat Brush" tool, this flat brush perfect for making wide strokes like teardrops, petals, etc. This brush are different in widths like 3mm, 5mm but their purpose are same.


This tools is called "Nail art Striper Brush" used for making thin designs which are made up of thin lines. This brush is perfect for the thin designs with protective plastic cover.

Saturday 25 February 2012

Sneakers Nail Design


Geeky Sneakers Design - How to make it?


This is one of the stunning presentations of unique and dashing nail art. For beautifying your nails with this nail art you need to bring some nail polishes of different colors and also one white nail polish for the top part of the nail. First apply colored nail paints on different nails. On first nail apply black color until the nail ends and then apply white nail paint on top part of the nail. After applying basic nail polish make four pairs of dots vertically and then draw zigzag lines between the opposite dots. Finally, in the end with the help of nail brush draw an arc shaped line from left side to right side. Likewise apply different colors of same nail art on different nails. Now get ready to make your friends jealous of your dashing and stylish sneakers nail art.

Wednesday 11 January 2012

Nail Art


Design your nails according to your preference, apply creative designs and makes your nails simple, beautiful, and attractive.

"How to design your nails – 8 simple steps to make your nails beautiful"

Nail art generally includes manicuring your nails by shaping, cuticle care and giving shi
ny finishing to the nails. It is an art which makes your nails beautiful and attractive. This shows decency and uniqueness in your personality. It enhances the outfit of nails and looks beautiful. Today women are crazy and demanding about nail art and trying to apply different designs on their nails that look original. They use matching nail paints with their dresses by creating attractive designs.

Here is step by step process which will make your nails shiny, attractive and beautiful.


First file your nails and give them good shape. There is need of proper manicure for creating nail arts.


Second select nail paints and polishes at your own choice and try to apply different paints according to your choice which you like most. Different tools are needed for making different designs like nail art kit, brushes, strippers, and marbling tools.


Third step is of ideas and techniques, try to apply different designs on your nails, if no any idea or technique come into your mind then go for different sources like YouTube or you can taking class at any nail salon and you can also read books on nail art.


Fourth step is about getting your material ready. Before starting make sure you have everything especially nail remover, in case any mistake occurs. Above all, you need patience because you are working against the time.


Fifth step is about base coat which gives your nails a base coat i.e. either of transparent white or pale pink. This coat gives your nails startling shine and a pretty look after applying coat.


Sixth step is to create nail art on top of the base coat, draw different pictures or abstract designs with the help of nail paints and brushes. Make different and decent designs which you like the most. Try to create simple designs on your nails, those simple designs look beautiful and pretty.


Seventh step is applying top coat after creating nail art. When nail paint become dry then apply top coat. It is used to seal and protect your nails.


Eighth step is about care of your art. Reapply top coat for two to three days. It makes your nails shiny and beautiful and your nail art looks fresh as it done currently. Care your nails while gardening or another work by wearing gloves in your hands in order save the paint from damage.